⬅️ Previous part: 12. Main menu ⬅️ Return to index
13. Juice it!
In this last piece we're introducing little bits that can make the game really stand out: progressively increasing the difficulty level, and spawning particle effects when Monster is collecting the shapes.

We'll start with the first one. Add a comment "Progressively increase game speed".

Add an action "Value of a scene variable", call it "GameSpeed", set the modifications's sign to + (add) and the value to 7*TimeDelta().

Add another comment, but higher up on the list of events, right below the Shapes: "Move shape according to the game speed". The difficulty level increase will make the shapes fall faster.

Edit the action and replace 100 pixels with Variable(GameSpeed).

This will be repeated for the bomb obstacle - add a comment "Move obstacle according to the game speed"...

...and then replace 100 pixels with 1.5*Variable(GameSpeed), so the bombs will fall even faster than the shapes.

Test it out and play the game for a bit to see if this really works as expected.
Note
You can make the game easier or harder by changing the GameSpeed variable yourself.

Now onto the particles. Click on "Add a new object" in the right panel...

...and select "Particles emitter".

Those emitters will spawn small shapes as particles after the Monster collects it. Object's name will be "Shape1Explosion", kind of particles: "Textured", then select the geometry1.png image, and enter the respective values: start with 20 particles, their height will be 20 pixels, start and end opacity will be 255, so they will be fully visible.

Scroll down to enter more values. Be sure to select "Delete when out of particles", to the emitter will spawn all the particles assigned to it and then will be removed as not needed anymore. Set the maximum number of particles to 10, number of particles in tank to 5, flow to 45 particles per second, minimum emitter force applied on particles to also 45, maximum to 85, spray cone angle to 360 (so the emitter spawns the particles in every direction), and radius of the emitter to 10.

Scroll down even more. Set the gravity on particles on both X and Y axes to 0 (we don't need gravity in our game), friction on particles to 2, particle minimum lifetime to 0,5 seconds and the maximum one to 1,5 seconds, particle start size to 100 and end size to 80 (so they get a little smaller after they are spawned), minimum rotation speed to 0 and maximum to 40 degrees per second (so some of them can rorate a bit).
Confirm all that by clicking "Apply".

Repeat the steps for the other three shapes: geometry2, geometry3, and geometry4.

Create the sub-comment for spawning the partcles, and then add a new condition.

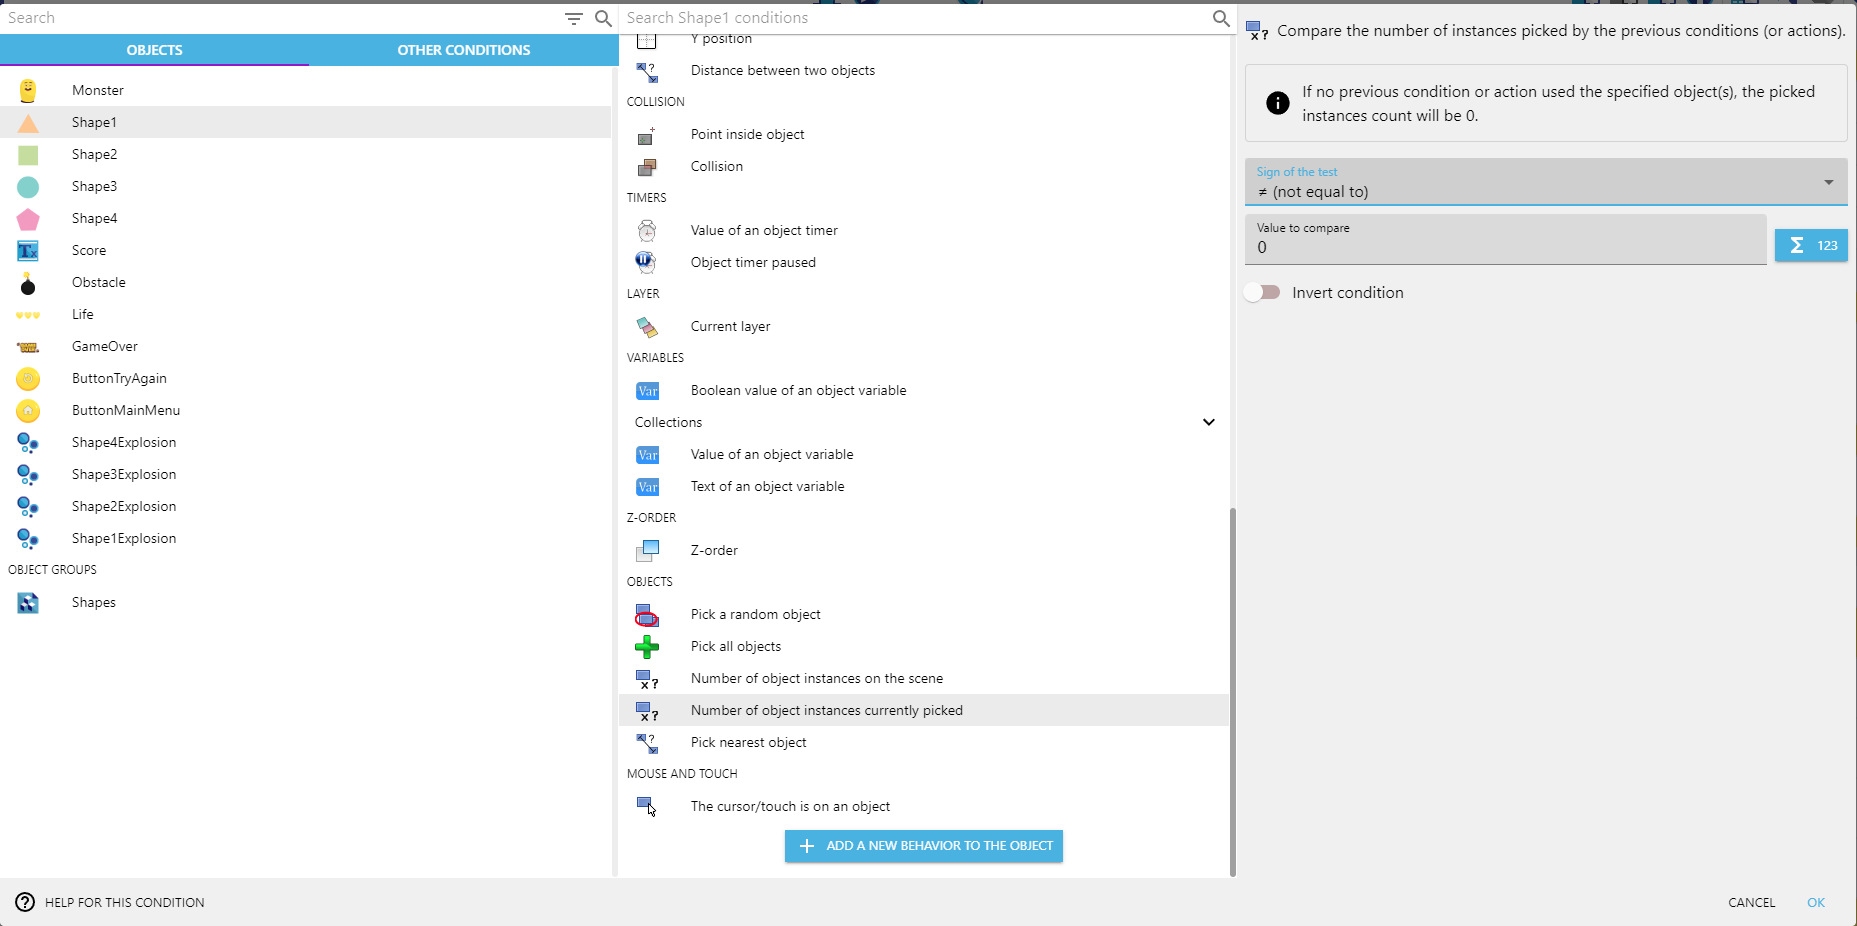
Select Shape1 from the list of objects, look for "Number of objects instances currently picked", and then "≠ (not equal to)" and 0 in the right panel.

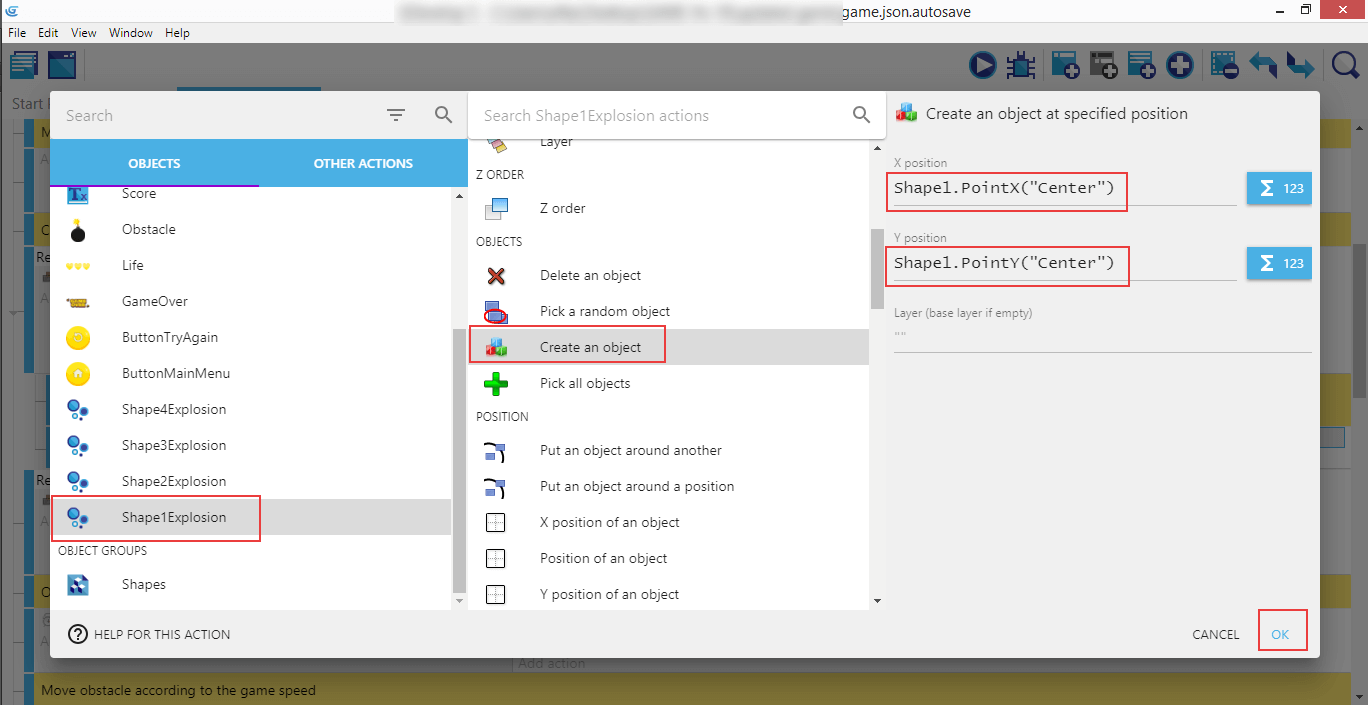
Add a new action: "Shape1Explosion" in the list of objects, look for "Create and object", and then X position to Shape1.PointX("Center") and Y position to Shape1.PointY("Center"), so they spawn in the middle of the shape they are going to replace.

Add another action: "Shape1Explosion" again, "Size, parameter 1" and then "= (set to)" with the value Shape1.Width().

Repeat the steps for the other three shapes.

Now we're gonna add the sub-comment for the section about deleting the shape when it's being eaten, and we're going to move the part responsible for increasing the score.

Drag the "Delete object Shapes" part below it...

...so it looks like this.

That's it! All the thirteen steps are now completed, and you've built Geometry Monster game from scratch, congratulations!
The game features infinite amount of shapes to collect, bombs to make collecting them a little bit harder, lives to counter that and ease on making mistakes, keeping the score, game over when Monster runs out of lives, switching between main menu and gameplay scenes, increasing difficulty level, particle effects, and much more!
Feel free to use it as your base and expand on top of it - add features, change the existing ones, and play with it to learn as much as possible.